Last time around we had just released NVDA 2022.3. This time, we’ve got even more newness!
NVDA 2022.3.1
This week, we have released NVDA 2022.3.1. This is a security patch release which fixes several obscure but potential issues. You can read the full details and download at the NVDA 2022.3.1 Release Announcement
Please note, after updating any software, it is a good idea to restart the computer. Restart by going to the Shutdown dialog, selecting “restart” and pressing ENTER. Updating software can change files which are in use. This can lead to instability and strange behaviour which is resolved by rebooting. This is the first thing to try if you do notice anything odd after updating.
NVDA 2022.4 Beta 2
Not only is NVDA 2022.3 still fresh and new, but NVDA 2022.4 is well on the way! We’re already up to beta 2 of the next version of NVDA which you can find at the NVDA 2022.4 Beta 2 Release Announcement.
NVDA 2022.4 includes several new key commands, including table say all commands. A “Quick Start Guide” section has been added to the User Guide. There are also several bug fixes. As well as this, both eSpeak-NG and LibLouis have been updated. There are new Chinese, Swedish, Luganda and Kinyarwanda braille tables. For those interested in what the next version of NVDA holds, we encourage you to download and test it out. The new beta includes the security fixes from NVDA 2022.3.1 as well as updates to some translations. Read more at the NVDA 2022.4 Beta 2 Release Announcement.
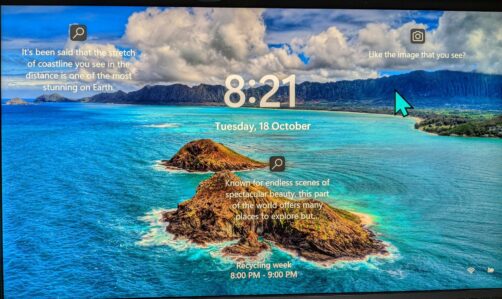
Disabling the lock screen
The lock screen displays an image while the computer is locked, and before the screen to enter your password or pin is presented. The lock screen is largely unnecessary, and in some cases, can pose issues. Several of the security issues fixed in NVDA 2022.3.1 involve the lock screen. The lock screen only appears when your PC is locked, but it is not itself a secure screen. If the lock screen is disabled, as soon as the PC is woken, you can enter your password or pin to log in.
The process for disabling the lock screen differs between Windows Home and Professional. Both are included below:
Using Windows Home
- Open the run dialog with Windows+R
- Enter and run: regedit (may require administrative access)
- Navigate to Computer\HKEY_LOCAL_MACHINE\SOFTWARE\Policies\Microsoft\Windows\Personalization
- If it does not exist, “Personalization” may need to be created as a key under “Windows”.
- Open the context menu with the applications key or shift+f10 on the “Personalization” folder.
- Create a new DWORD (32-bit) value from the menu.
- Set the name to NoLockScreen
- Set the value data to 1
Using Windows Professional
- Open the run dialog with Windows+R
- Enter and run: gpedit.msc (may require administrative access)
- Using the “Local Group Policy Editor” window
- Navigate to Local Computer Policy, Computer Configuration, Administrative Templates, Control Panel, Personalization, Do Not Display the Lock Screen
- Enable “Do Not Display the Lock Screen”
- Confirm with Windows+L that the lock screen is skipped and Windows goes directly to the secure sign-on screen.
Windows 11 lock screen
Enabling people to achieve
During the week, one of the donations we received came with a lovely note from one of our users. Larry proclaimed: “I couldn’t write the books I have had published without the support of you.”
Thank you, Larry! We couldn’t do what we do without support from people like you!
If you’d like to donate, please go to: https://www.nvaccess.org/support-us/#donation-support. Donations within Australia at least are tax deductable.
eSpeak-NG update
We mentioned in the previous In-Process that eSpeak-NG has been updated in NVDA 2022.3. One of the updates involving eSpeak-NG changed how it sounds at speech rate 100. Although it corrected an issue, it has been noticeable for some users. If you use eSpeak-NG at speech rate 100 and have noticed the change, you can get the earlier sound back. Set the speech rate all the way back to 19, and turn rate boost on. This can be done from the Voice settings (NVDA+control+v) or with the synth settings ring. Press NVDA+control+left or right arrow to select the speech option to adjust. Press NVDA+control+up arrow to increase the option or NVDA+control+down arrow to decrease the option. Please note, if you use NVDA in laptop keyboard layout, you will need to add SHIFT to those keystrokes. NVDA+shift+control+up arrow to increase the current options, for instance.
Task manager in Windows 11 22h2
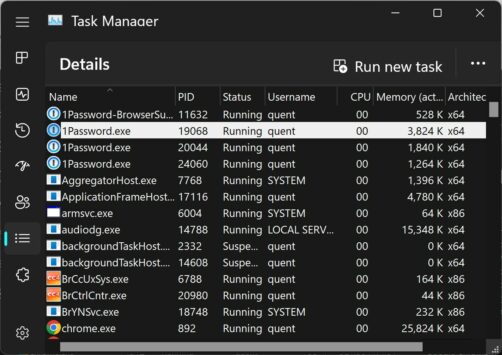
Task manager from Windows 11 22h2
Recently, we shared some tips on navigating the Task Manager in Windows 10 and 11. Of course, soon after this came out, so too did Windows 11 update 22h2 with changes to Task Manager. Microsoft stagger the rollout of new features and major updates. So, this latest update may not be available to you yet. It took a few weeks before it was available on my machine. Now it is, I can confirm there are a couple of changes with the updated task manager. Mostly good, but some changes to the steps I previously shared.
- Firstly, the initial task manager view looks like the earlier “more details” view. You no longer need to specifically change to that to get the extra information.
- The task manager now works in dark mode if you have Windows set to use dark mode. Dark mode displays light text on a dark background, and is easier to see for most users, as well as using less battery.
- With the focus in the initial task manager view’s list of items you can arrow through options, but as previously, you can’t get to all the information.
- There are more options in the context menu now, although I’ll leave it to other articles to explain what they all do.
- The task manager is now a window rather than a dialog. To close the window, press alt+f4 (previously you could press escape)
To get to the details view in Windows 11 22H2:
- Tab to the “Open navigation button”
- Down arrow to “Details not selected 6 of 7”
- Press enter. That opens the details view which works like in the earlier In-process article
You can also change the default view, so if you like details view, you can set it to open automatically:
- Tab to “Settings”
- Press enter. The first option is “default start page” which is set to “processes”.
- Press down arrow to “Details”.
- There is no “apply” button, but the current selections are saved when you close settings.
From the settings screen, press shift+tab to “open navigation button” and select something else. Alternatively, close task manager altogether.
Note that you can also change views with control+tab but note that new views take a few seconds to open.
What else have you noticed new – either with task manager or anywhere else in Windows 11 22h2? Comment in the NVDA Chat group and share what you’ve discovered!
That’s all for this week. We’ll be back in a couple of weeks as we get closer to the release of 2022.4.