Can you believe it’s December already?! As we speed towards Christmas, let’s check out some more presents from NVDA 2023.3. Plus, everything else going on in the world of NVDA, and a big tutorial on Object Navigation.
Navigating tab groupings
One of the new features in NVDA 2023.3 gives you another navigation option on the web. “Added an unassigned gesture to navigate by tab groupings in browse mode”. This introduces two new gestures (for “move to next tab” and “move to previous tab” in the Browse mode input gestures. Tab groupings are found on some complex web sites and web apps. In Gmail, for instance, you can use the feature to move between the different categories (Primary, Promotions, Social, Updates and Forums).
There are no gestures already assigned for navigating by tab groupings. If you want to set a gesture for moving between tabs, you will need to use Input Gestures. In the dialog, search in “Browse mode” for “Move to next tab” and “move to previous tab” (Be sure to set both).
We have talked about using Input Gestures in In-Process before. The first time we covered it was back when we introduced Screen Curtain. We didn’t include a shortcut key by default for that feature. One of the most common requests we have had was how to use that feature and set a command for it. So be sure to check that previous post out if you need a refresher on setting input gestures for commands which don’t have one.
As a sneak peak into NVDA 2024.1, we have now assigned a gesture to screen curtain. NVDA+control+escape will toggle screen curtain for NVDA 2024.1 and later. Please note this is not assigned in NVDA 2023.3!
Pasting text only in Word
We’re not the only ones updating shortcut keys. Many users are familiar with using control+shift+v to paste text without formatting. It works in many places and programs such as Gmail and Microsoft Teams. Microsoft have now added the keystroke to Microsoft Word, at least in Office 365 16.0.17029.20028. Previously, pasting without formatting was possible but required extra steps. This change was initially announced in their Insiders blog back in March this year, and it is now rolling out to regular Office 365 users.
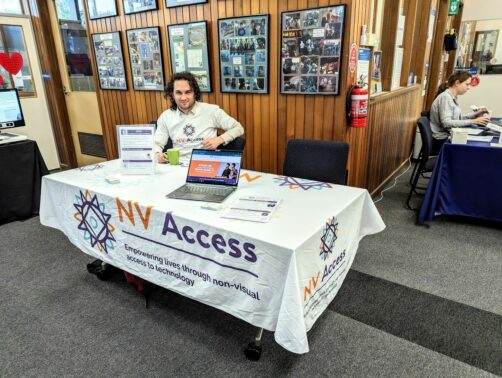
SVRC Tech Expo
Quentin and Sean hit the road recently to attend Statewide Vision Resource Centre’s Tech Expo. This annual event is a great opportunity to share NVDA in person with students and teachers, get feedback and give a live presentation on NVDA. The event is held in Donvale (Eastern Melbourne, Australia) each November
What is object navigation?
One of the more advanced concepts in NVDA is Object Navigation. But what is it? And what is the Flat Navigation we introduced in NVDA 2023.2? Great questions! Let’s have a look. Please note, for this section, each command is listed with two keystrokes. The first is the desktop keyboard layout keystroke, and the second is the laptop keyboard layout keystroke. Use the keystroke for the layout you have NVDA set to.
In many places on the PC, you can get around with traditional navigation keys like tab, arrows, or program assigned shortcut keys. For instance, F6, which often jumps between main sections of a program. Sometimes there are things which just aren’t accessible with the keyboard normally. Object navigation is designed to provide a way of getting to these areas. In 2020, we covered using object navigation to get around the settings in Windows 10.
One way to think about objects is that each main part or element in a program is an object. Objects are a little like the tree view in Windows Explorer. Object can contain other objects, which can also contain other objects. The Ribbon in Office is one object with objects inside for each ribbon header (home, edit, view, etc). Inside each ribbon header are objects for the sections of each ribbon. For instance, Clipboard, Font, Paragraph and Style in the Home ribbon. Finally, inside the sections, each individual ribbon item is an object, like the “Bold text” button in the “Font” section.
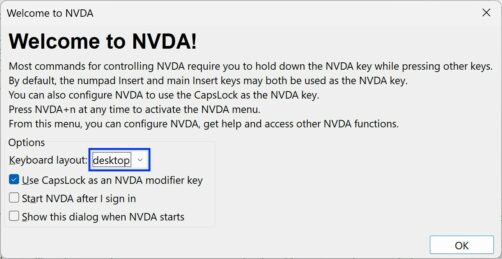
When you first install NVDA, it shows a “Welcome” dialog. This dialog has a paragraph of text, some options you can set and an OK button to close the dialog. To open the dialog, press NVDA+n to open the NVDA menu, then h for help, then locate “Welcome dialog” and press enter.
When the dialog opens, NVDA reads out the text, and the focus is on the first option (to set the keyboard layout). You can tab between the options, but how do you get NVDA to read the welcome text again? You can press NVDA+b to read the whole dialog box, which would work ok in a relatively small dialog such as this. Object navigation gives you more control, allowing you to move between each item. There are keystrokes to move to:
- The previous object (NVDA+numpad 4 or NVDA+shift+left arrow)
- The next object (NVDA+numpad 6 or NVDA+shift+right arrow)
- The containing object, that is, the one the current object is inside (NVDA+numpad 8 or NVDA+shift+up arrow)
- The first contained object, that is, the first object inside this one (NVDA+numpad 2 or NVDA+shift+down arrow)
- Open the dialog with NVDA+n, then H, then L.
- Use the “Move to previous object” and “Move to next object” commands to explore the settings. These are things you may wish to set when first running NVDA. These are all inside a grouping called “options”.
- Press the “Move to containing object” command. NVDA will report “Options grouping.
- Now use the “move to next object” and “Move to previous object” commands. NVDA moves between the “Welcome” heading, the text, the options grouping and the OK button.
- Leave the dialog open to return to shortly
- Move to previous object in flattened view (NVDA+numpad 9 or NVDA+shift+left square bracket)
- Move to next object in flattened view (NVDA+numpad 3 or NVDA+shift+right square bracket)
- Use the “move to previous object” command to move back to the “Welcome to NVDA” heading.
- Now press the “Move to next object in flattened view” command.
- Keep pressing the command. NVDA moves through each object in the dialog ignoring hierarchy.
One new feature in NVDA 2023.2 is the ability to move between objects in a “flattened view”. This lets you move forwards or backwards through each object in a logical order. These commands automatically move into and out of contained objects. The two commands for this are:
- Press the “Move to focus” keystroke (NVDA+numpad minus or NVDA+backspace). In the case of the Welcome dialog, this will move back to the keyboard layout combo box (unless you had pressed tab).
- Move the focus (eg with tab). Unless you have disabled “Focus moves navigator object” with NVDA+7
That was long, and hopefully not too confusing. If you would like to go through that in more detail, I would strongly recommend “Basic Training for NVDA” from the NV Access Shop. That training material contains a full section on object navigation. There is also another full section on the review cursor – a related concept we didn’t even touch on here.
That’s all for this week. We’ll be back closer to Christmas. In the meantime, do try out object navigation, especially if you haven’t before. Do also let us know your favourite new feature or update from 2023. We’ll list some of our favourites next time around!